Your iPhone 13 can be a powerful productivity and document management device if you know how to scan documents on iPhone 13 and manage all the scanned documents using your phone’s built-in resources. There is no need for a third-party app and not even a PC if you are aware of the powerful features of one of the iPhone’s niftiest apps called Notes.
Here you will learn about how to scan your documents using iPhone 13, save them as PDFs, and do other things with Notes that make document management jobs easier and more portable than ever.
Steps to scan documents on your iPhone 13
The Notes app on iOS 15, which iPhone 13 uses, is the same as that on iOS 14. If you are familiar with scanning documents on iPhone 13, it should be easy for you to do the same job on iPhone 13. Regardless, here are the necessary steps.
- Get the paper document that you want to scan ready for scanning. If the document consists of multiple pages, it would be better for you to unbind the document and prepare each page separately.

- Access the document scanning feature of the Notes app. There are two ways to do so.
-
- Firstly, you can open the Notes app, create a new document, tap on the Camera button, and tap on Scan Document.
-
- Alternatively, swipe down the home screen to reveal Control Center, tap on the Notes icon on Control Center, and tap on Scan Document. If the Notes icon doesn’t appear on Control Center, add the icon from the Control Center settings.
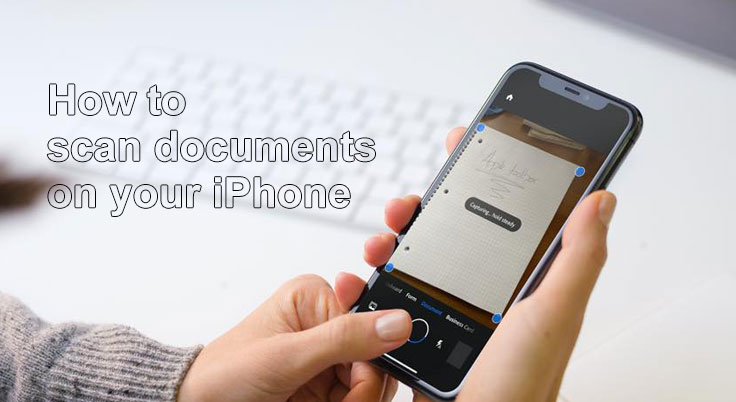
- Point your phone’s camera to the document that you want to scan. The camera will scan the document either automatically or manually depending on your preference.
- In the automatic mode, the camera will scan the document automatically when it clearly “sees” the document. If you prefer the manual mode, tap on the Shutter button or one of the volume buttons. A rectangle with draggable corners will appear on the screen. Drag these corners to have the rectangle enclose the document. Tap on Keep Scan to start scanning it.

- At this stage, your newly created document has included one scanned page. If you tap on Save, the document will be saved as a PDF with only one page. If the document consists of multiple pages, have the Notes app scan the remaining pages one by one using the same procedure. Finally, you can tap on Save to saving the document.
Documents Management with Notes
With Notes, you can do many cool things to your documents other than scanning. If you have multiple documents on your phone, you can pin the most important documents to give you faster access to them. You can also create folders and put your documents inside the relevant folders according to their topics or categories. The Notes app also allows you to view all your documents in gallery mode, which is visually better than the generic folder view.
If you have learned how to scan documents on iPhone 13, it might be good for you to learn about other stuff you can do with your iPhone 13 and Notes.